Sekedar ingin berbagi pengalaman menginstall , dan setting , LINUX UBUNTU 8.04
Akhirnya dengan sedikit perjuangan UBUNTU 8.04 Gw hasilnya jadi begini :

Pada awalnya gw ragu seh , tapi karena pake xp gw sering bermasalah , gw nekad de coba"....
BAGIAN I. DARI AWAL BANGET , Partisi HArd Disk
1. Siapin HArd Disk . ambil contoh 80GB deh ,........Buat Partisi :
30gb - untuk XP , format bole NTFS / FAT
1gb - Untuk Linux Swap , ga usa di format
15gb - Untuk Linux System , ga usa di format juga
2. Install XPnya , sampe selesai..............
3. Kalo mo beresin XPnya silahkan beresin dolo , setelah itu lanjut ke BAGIAN II
BAGIAN II. INSTALL UBUNTU
1. Masukin CD ubuntu , booting , pilih Run ubuntu from cd ........
2. Setelah masuk , ubuntu , setting network....... sampai i-net bisa jalan , test pake firefox / ym (penting}
3. Pilih Install
4. Pilih Bahasa , ikutin teyus sampae dengan pilihan harddisk , pilih MANUAL , lalu pilih Partisi yg 1 GB , use sebagai swap , lalu yg 15GB di edit use isi "/" , hanya tanda /
5. Lanjut, selama install , Bro n Sis tetep bisa browsing i-net kok , jgn takut bengong kaya install XP ,
6. Setelah selesai , Booting pasti dia nanya mo pake OS yg mana , ada pilihan Ubuntu n win XP
7. Selesai.......... Gampang khan.........
NB kalo mo langsung ke Bagian II , booleh aja , buat dolo partisinya pake windows xp , pake acronis disk director ato morton partition magic , atau yg sejenisnya deh....
BAG III . MEMPERCANTIK UBUNTU...
1. Langkah pertama setelah install ubuntu tetap.....setting network , i-net harus jalan!!
2. Set Welcome Screen , Theme , bisa dodod di :
http://www.gnome-look.org/
3. Set Theme ke System , Prefrences , Appreance , Install , lalu pilih file yg di dodod dari link tadi, Bisa juga set Background Wallpaper disana
4. Set Welcome Screen ke System Administration , Login Windows , LOCAL
5. Set Bunyi LOGIN , System , Preference , Sound
6. Jangan lupa set Themes FIREFOXnya , dah tau khan , di menu tools , add on............
DAH MANTAB , WALLPAPER , LOGIN , THEME , SUARA . FIREFOX, BEYES................
Bagi Bro N sis yg uda terbiasa pake win .... pasti ga suka pada panel di ubuntu , karena ...... Panel nya ada 2 , atas dan bawah ..... ngeselin deh ... makan tempat......... nah , utk tahap pemula coba diperhatikan dolo , kira" yg berguna yg mana , yg ga guna , di remove aja , caranya klik kanan , lalu pilih remove from panel
lalu icon2 nya di buang , disusun" lah sukanya gimana........ (nih enaknya ubuntu) ga kya XP gitu"ajah
Kalo Gw bikin jadi begini :
Panel Bar yg diatas gw tambahin network system (dekat jam) biar bisa liat connection lagi dipake seberapa
Panel Bar yg dibawah , sengaja gw delete , gw ganti pke , avant bar (instal pke synaptic searc "avant") , bisa animasi n auto hide....... liat aja di gambar diatas.........
BAG V. COMPIZ FUSION..........
1. Pertama , VGA HArus sudah terdetect........ kalo gw pake nya ATI RADEON X1050 , set nya :
biasanya dia minta password, isi password
lalu muncul :
pilih ATI
lalu muncul :
pilih enable
lalu dia dodod driver .........
lalu restart :
2. INSTALL COMPIZ :
Matiin Visual Effect , ke sistem prefference , appreance , visual efffect

Lalu Ke Application , Add/Remove

Di "Show" pilih "All available applications", "Search" ketik "compiz"
Tandain "Advanced Desktop Effects Settings" dan "Compiz Fusion Icon" , Apply
Lalu Buka Application , System Tool , compis Icon
Nanti di kanan atas , akan keluar icon compiz , lalu klik kanan pilih reload windows manager
Lalu ke System , Prefrence , Advance Desktop Effect Setting
Tandai Desktop Cube , dan Rotate Cube
kalo keluar ne , pilih Disable
Sekarang Testing dah Tekan : Tahan "Alt + Ctrl + Klik Kiri Tahan + Goyangin Mouse"
Kalo mo jadi gini :
Ke , "General Options" lalu "Desktop size", dirubah "Horizontal Virtual Size"
Di Utak Atik ajah , yg penting , satu" n balikin lagi ke default , biar ga kacau ...... OK ?
Nah Langkah TErakgir ne , biar compiz load abis restart :
Ke "System -> Preferences" -> "Sessions" di menu "Startup Programs" klik "Add" .
Isi "Name" = "Compiz"
Isi "Command" = "compiz --replace"
Isi "Comment" = "3D Desktop"
DAH SELESAIIIIIIIIIIIIIIII MET MENCOBA.........
Senin, 12 Mei 2008
Compiz Fusion {TESTED!!!} UBUNTU 8.04
TIPS SETTING USB DALAM VIRTUAL BOX
Secara default, Ubuntu Gutsy Gibbon telah menghilangkan support untuk /proc/bus/usb/*, hal itu menjadikan Usb tidak bisa langsung digunakan dalam VirtualBox. Agar USB device dapat digunakan di VirtualBox, editlah berkas /etc/init.d/mountdevsubfs.sh:
$ sudo nano /etc/init.d/mountdevusbfs.sh
=====>>>>>untuk lebih mudahnya installah MC dahulu hhehehehe
klu pake MC (cara ke-2):
masuk console(terminal)==>ketikkan sudo su kemudian masukkan password, setelah masuk root==>
$ mcedit /etc/init.d/mountdevusbfs.sh tekan enter :
kemudian carilah baris berikut:
..........
# Magic to make /proc/bus/usb work
#
#mkdir -p /dev/bus/usb/.usbfs
#domount usbfs «» /dev/bus/usb/.usbfs -obusmode=0700,devmode=0600,listmode=0644
#ln -s .usbfs/devices /dev/bus/usb/devices
#mount --rbind /dev/bus/usb /proc/bus/usb
..........
Uncomment beberapa baris di atas, sehingga tampak seperti ini:
..........
# Magic to make /proc/bus/usb work
#
mkdir -p /dev/bus/usb/.usbfs
domount usbfs «» /dev/bus/usb/.usbfs -obusmode=0700,devmode=0600,listmode=0644
ln -s .usbfs/devices /dev/bus/usb/devices
mount --rbind /dev/bus/usb /proc/bus/usb
..........
Lalu tambahkan group dengan nama usbusers (System > Administrations > Users and Groups) kemudian tambahkan username Anda ke dalam groups usbusers tadi. Lakukan pengeditan untuk berkas 40-permissions.rules
$ sudo nano /etc/udev/rules.d/40-permissions.rules
cara 2==> pake MC:
masuk root seperti cara pertama tadi kemudian ==>
$ mcedit /etc/udev/rules.d/40-permissions.rules
Carilah line berikut ini:
# USB devices (usbfs replacement)
SUBSYSTEM=="usb_device", MODE="0664"
Ubah seperti ini:
# USB devices (usbfs replacement)
setelah melakukan perubahan tekan F2 untuk menimpan kemudian tekan F10 untuk keluar
Setelah semuanya dilakukan, restart komputer Anda. Lalu mainkan VirtualBox-nya. Lihatlah di bagian setting, akan terdapat menu USB. Selamat mencoba…

… continue reading this entry.
Avant Window Navigator (Awn)
Avant Window Navigator (Awn) is a dock-like bar which hosts shortcut links and open windows and applications. Therefor you may consider replacing your windolist applet in gnome panel with this one. It is also almost like the other windowlist screenlet that I talked about earlier.
It has good looking visual effects, you can set background patterns or jusr use its default semi transparent glassy appearance.
Long story short, go to synaptinc, then:
settings > repositories > third-party software
and add:
deb http://download.tuxfamily.org/syzygy42/ feisty avant-window-navigator
then again in synaptic, click on reload button.
Now search for:
avant-window-navigator-svn
and have it installed. Then in terminal type:
avant-window-navigator &
and start having fun. If you like it, add it to your startup programs in sessions.
You should be aware of the fact that avant window navigator is not free of bugs. For instance, sometimes the background does not stay on top and you have to close the application and restart it to make it right. It also gets tricky sometimes, when you want to add a new application. The usual way to add new application is to drag and drop it on the bar.
But the good news is that once it is up and running, it runs (almost) flawlessly.
My personal advice is to use windowlist screenlet if you want something more stable. Though you won't have the integration of quick links and open windows under one roof. But if you are looking for something truly amazing, go for Avant window navigator.
.
Compiz Fusion Ubuntu 7.10
Ya... temen-temen yang mau setting Compiz Fusion buat Si UBUNTU nya !!??
Monggo....silahkan klick di bawah ini.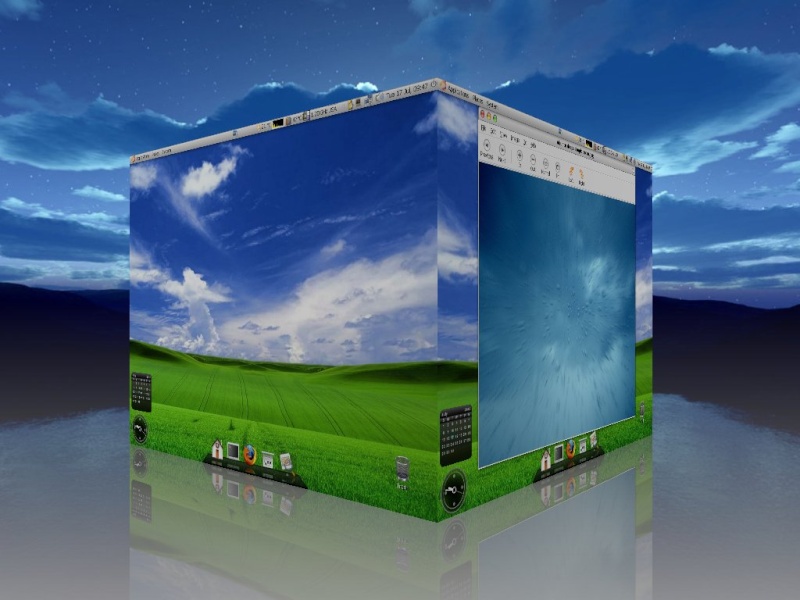
As you may know by now, Compiz and Beryl have merged and the resulting composite manager is called Compiz Fusion. As the name implies, Compiz Fusion has the best of two. The good news is that it is not just an amalgamate of Compiz and Beryl. It shows very good features and eye candies too. One beautiful eye candy is the reflection in Expose mode. You are well aware that reflection has become a hot feature everywhere. Apple has the lead and even Microsoft uses reflections! Where? have look at the left lower corner of Media Player 11.
I am particularly pleased to see that we have a nice and (almost) user friendly setting manager in place.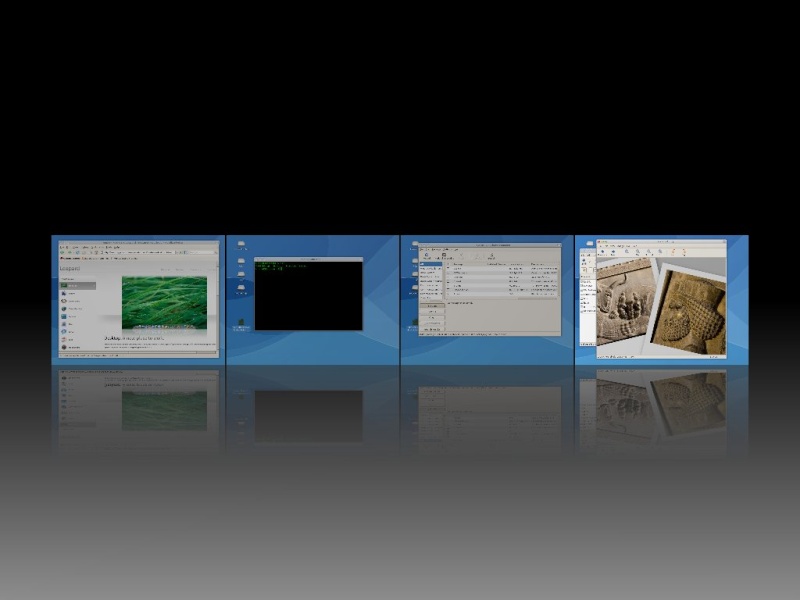
I assume that you are using Ubuntu Feisty Fawn (7.04) and gnome.
The first step is to disable Compiz (desktop effect) if it is running.
Then you need to un-install Compiz. So in terminal type:
sudo apt-get -y remove compiz-core desktop-effects
Then add the following line to third party repositories in synaptic:
deb http://download.tuxfamily.org/3v1deb feisty eyecandy
In terminal type:
wget http://download.tuxfamily.org/3v1deb/DD800CD9.gpg
and then:
sudo apt-key add DD800CD9.gpg
Now in synaptic, hit reload button.
The penultimate step is to install Compiz Fusion. In terminal:
sudo apt-get -y install compiz compiz-gnome compizconfig-settings-manager compiz-fusion-plugins-extra libcompizconfig-backend-gconf
Finally, in terminal type:
compiz --replace
to activate Compiz Fusion.
You should be able to find your new Compiz setting manager in your preferences menu.
As usual, you may add the latter command to your sessions to have it up and running every time the system starts up.
.
.
Menginstal Ubuntu Gutsy Dengan Memori Pas-pasan
![]()
wew hehe
Tahukah KAmuuuuu bahwa pada Ubuntu versi 7.10 terdapat fitur istimewa yang berkaitan dengan proses instalasi dimana tidak ada pada rilis sebelumnya? Fitur tersebut bernama ubiquity. Dengan fitur ini Anda bisa menginstall ubuntu versi desktop live cd dengan tampilan GUI namun tanpa perlu terlebih dahulu masuk ke mode desktopnya. Istilah mudahnya, begitu boot langsung masuk mode install grafis ![]() .
.
Bila Anda memilik komputer dengan memori pas-pasan hanya 256MB atau kurang, hanya memiliki cd ubuntu 7.10 versi desktop live cd saja, dan selalu macet saat menginstall, maka ubiquity adalah solusi yang klop ![]()
Seperti diketahui bahwa untuk menjalankan dan menginstal Ubuntu 7.10 diperlukan memori minimal 384 MB. Persyaratan ini bisa Anda baca dengan menekan tombol F1 dilanjukan F2 saat pertama booting dari CD.
Lalu bagaimana cara mengaktifkan ubiquity ini? Caranya mudah, dari layar boot ubuntu, pilih “Start Ubuntu in safe graphic mode“. Selanjut tekan tombol F6 (Other Options) Selanjutnya pada baris paling akhir, tambahkan manual “only-ubiquity†(tanpa tanda petik). Lalu tekan enter.
Apabila benar maka akan muncul tampilan GUI dari instalasi ubuntu seperti pada Gambar
gut luk yee ![]()
.
